- Tips & Tricks
- Jul 01, 2024
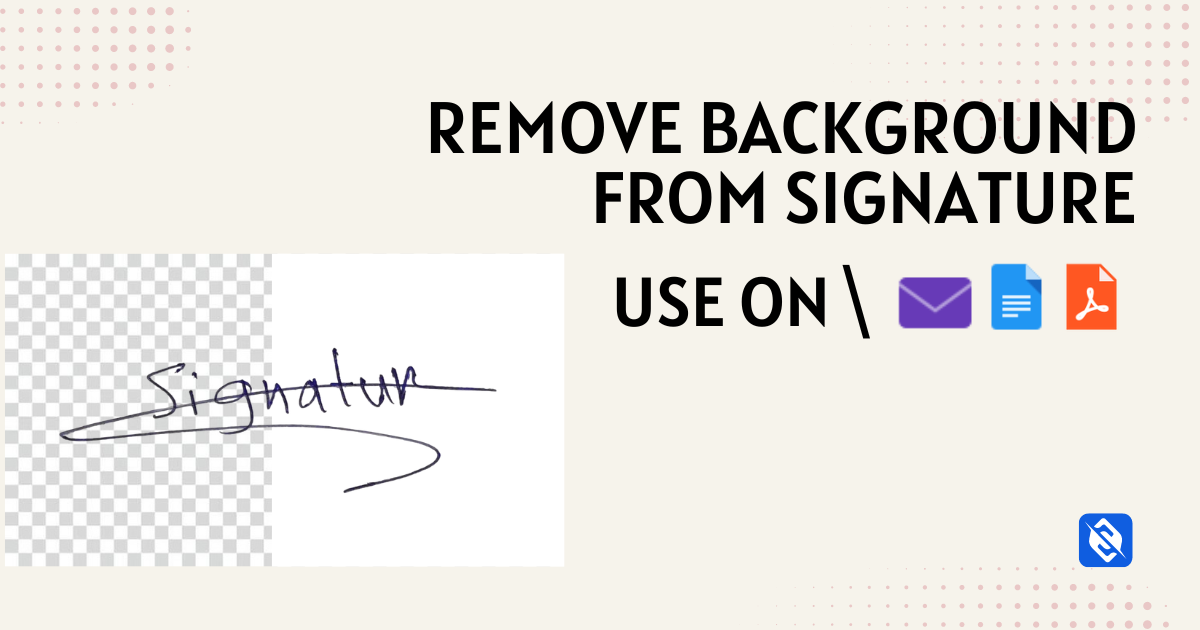
Remove Signature Background and use it in PDFs, Google Docs, Email, and more
Do you find yourself signing a piece of paper, clicking a photo, and then uploading or using it directly to a website? While this is a simple way it needs a more professional touch that digital workflows demand. In this post, we will look at how you can make your signature look more polished, professional, and versatile across other platforms.
Let’s dive in.
Why remove the background from Digital Signature?
The are several benefits of removing background from the signature.
- Consistency: It ensures that your signature looks consistent across all platforms.
- Clarity: It gives the signature a clear look and makes it easier to read and interpret.
- File Size: The file size is comparatively smaller than the real scanned image file, making it simpler to upload to other platforms.
- Professional: Gives your documents a more polished look. Along with a clean signature, using an AI Text Formatter can also help you refine the surrounding text so your documents look consistent and professional.
- Accessibility: Distraction-free background makes it easier to use the signature on electronic documents.
Using Slazzer to Remove Signature Backgrounds
The first step is, getting the signature.
- Sign on a piece of paper, click a good photo, and ensure good lighting(use your phone’s inbuilt flashlight)
For this tutorial, we will be using this signature(source – StackOverflow)

For this tutorial, we are using the slazzer web app, available at slazzer.com, for your convenience you can also use Slazzer’s background removal app.
2. Head over to slazzer.com, drag and drop the scanned signature, or upload from your desired folder by clicking the “Upload Image” button.
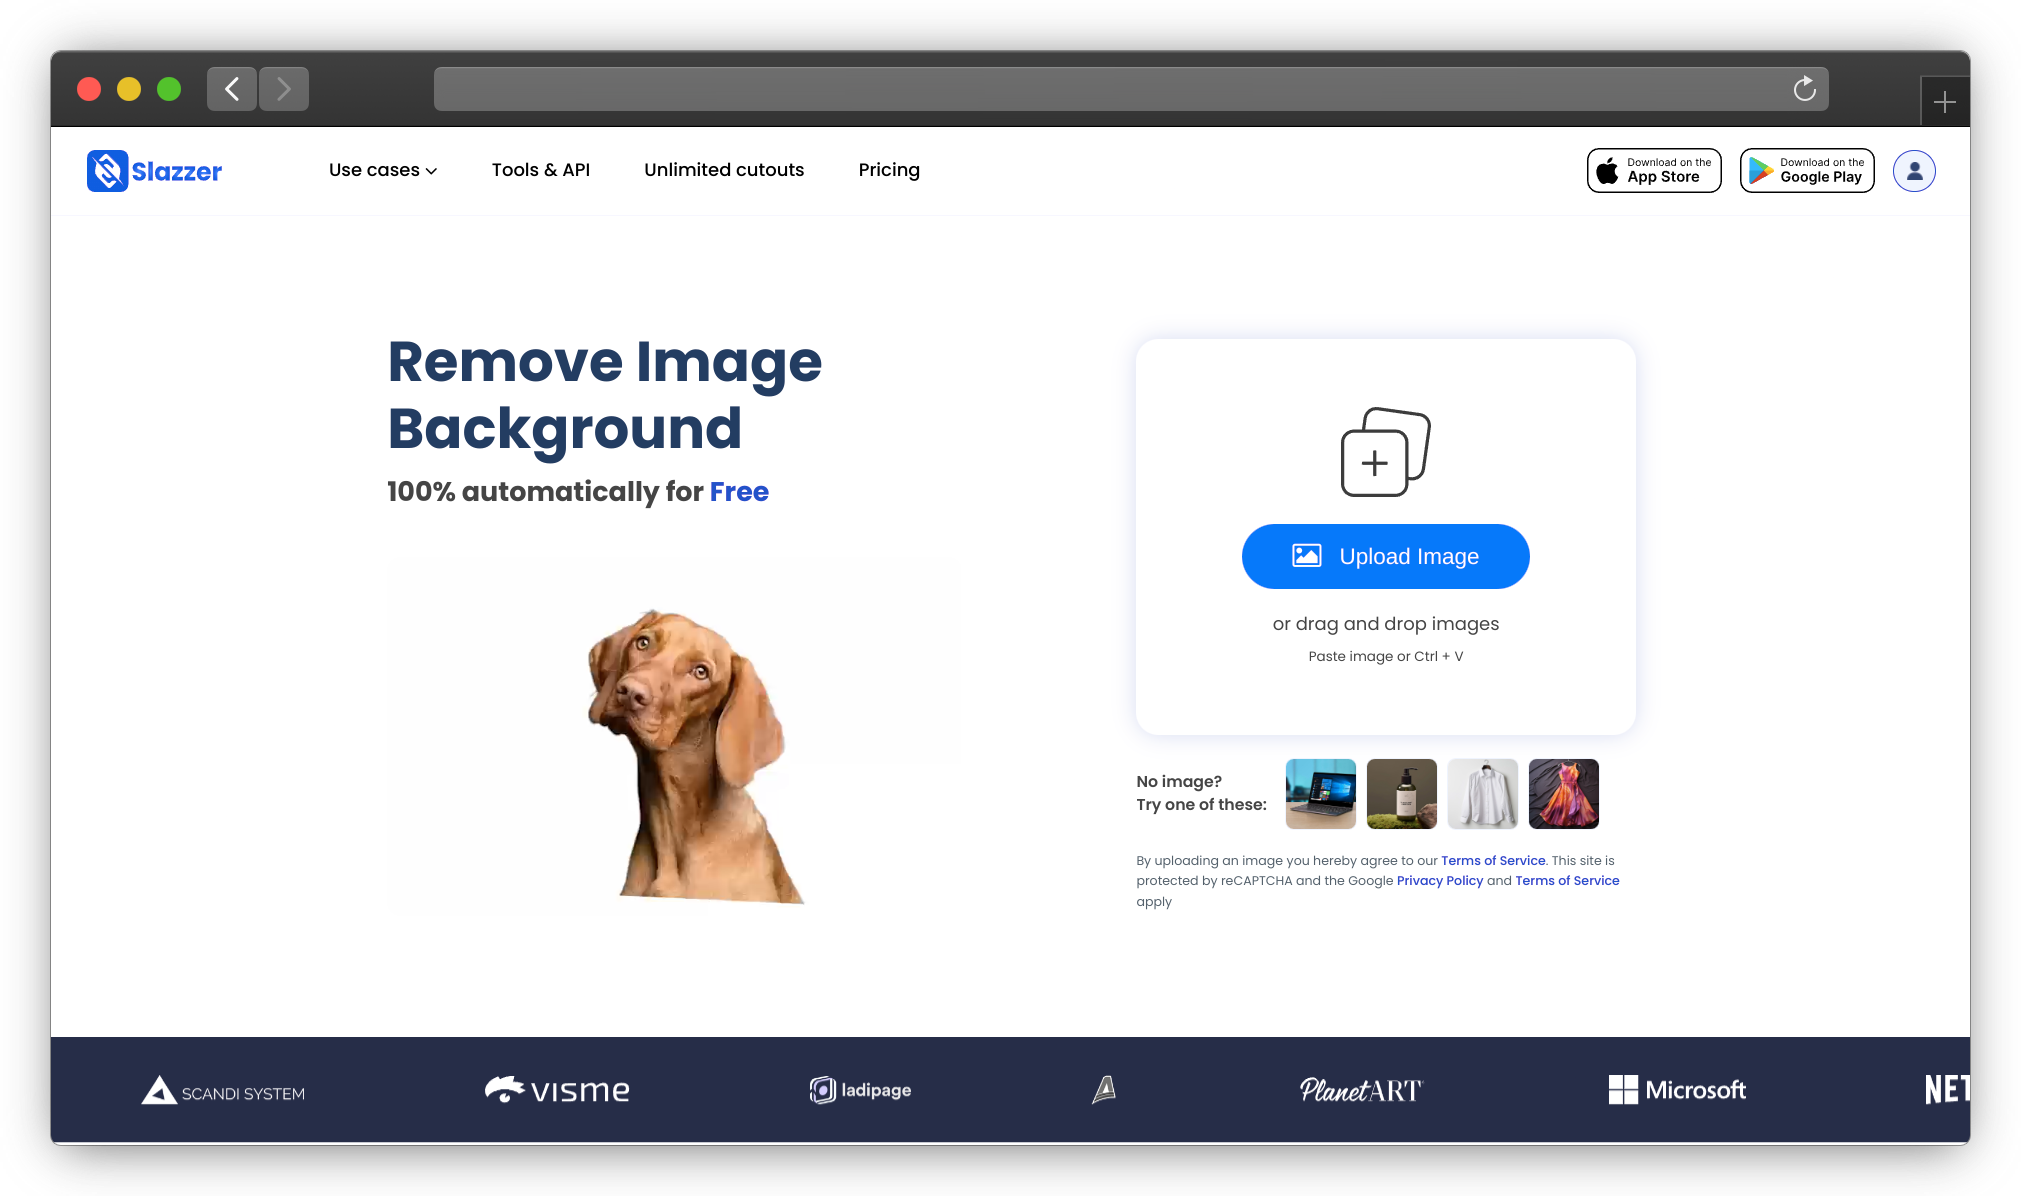
3. The Slazzer AI will automatically run the image and will give you a transparent background signature image within seconds.
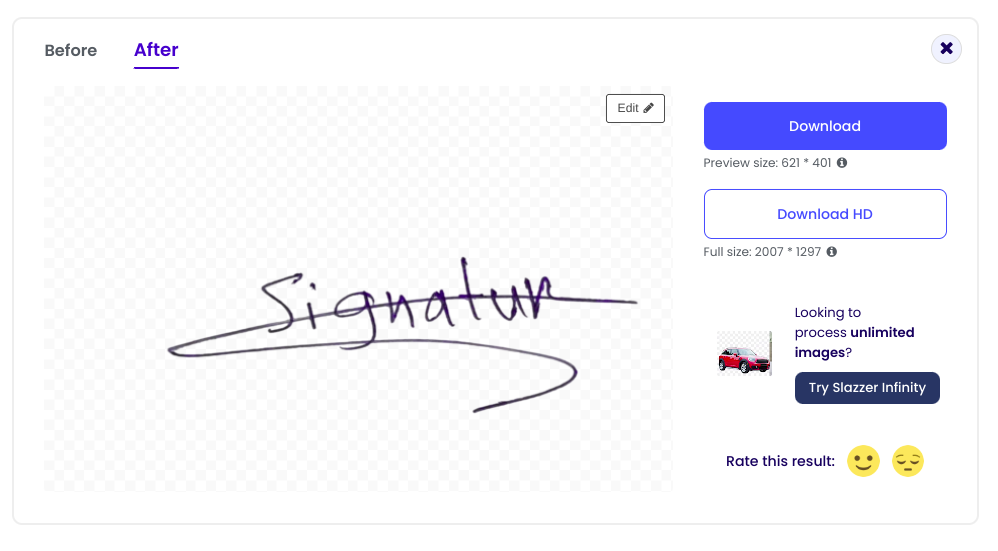
4. You can customize the signature more by restoring the parts you need or changing the background color. Once you are satisfied you can download the image for free or sign up to download the high-quality transparent background signature.
Here is what the output will look like.

Now your digital signature is ready, let’s see how we can use it.
Adding signature in your Emails
Including your signature in your emails will give a professional look and can even support better email deliverability, since recipients and providers see consistent, professional communication. Let’s take a look at how you can add a signature in your email, for this tutorial we will be using Gmail for all other email clients like Outlook, Neo, Spark Mail, and others the process is kind of similar.
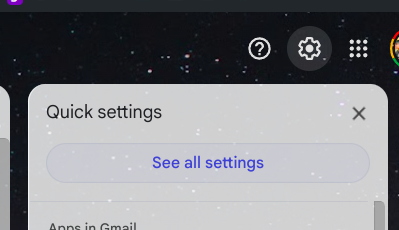
- Head over to Gmail, find the setting button on the top-right corner, click on it, and head over to ‘see all settings’.
- Scrolling a bit below, you will see an option for adding a signature.
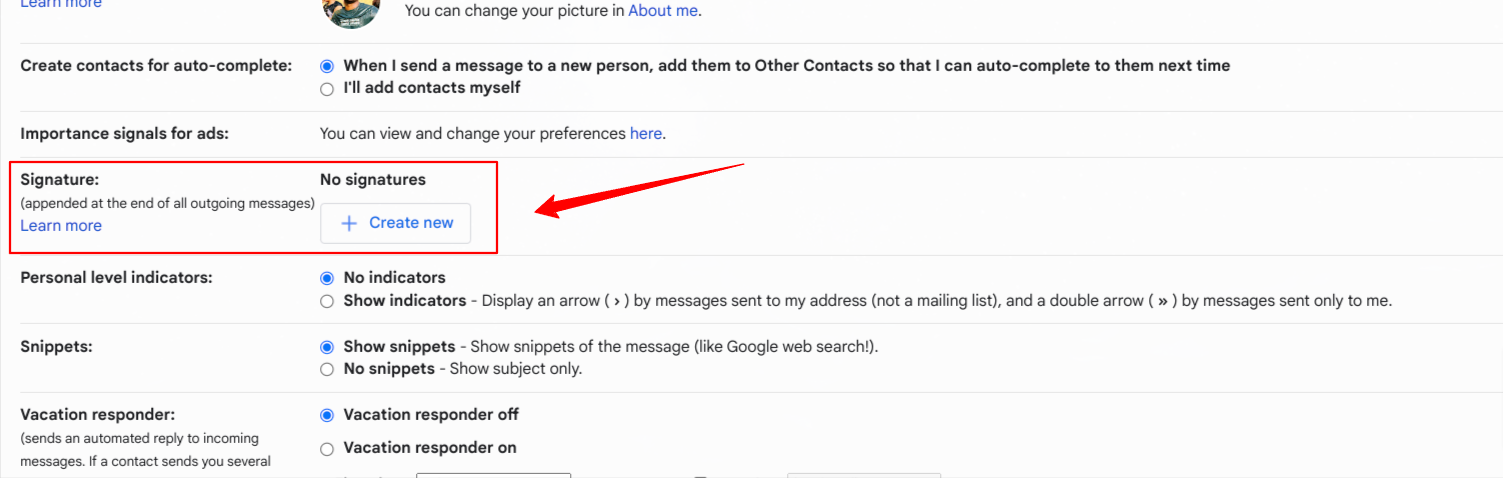
Click on ‘Create new’ and name your signature, after naming a small text box will open, and you can upload the signature using the image icon.
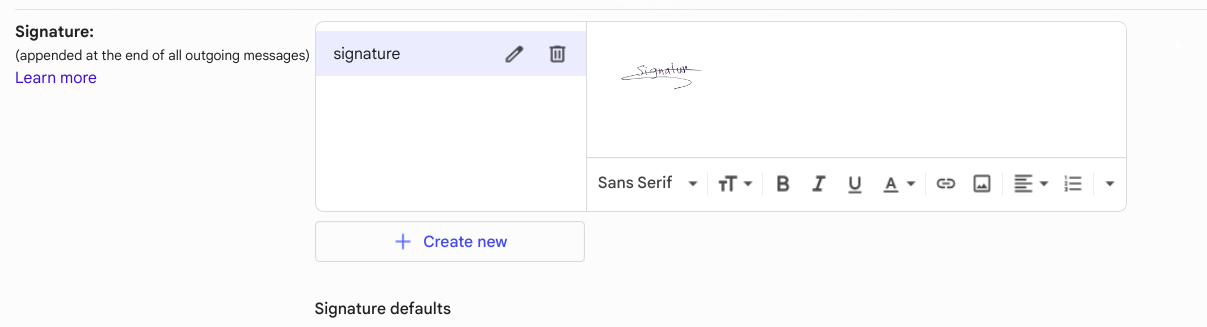
After doing this, all the outgoing emails will have your signature.
Inserting Your Signature in Google Docs
It’s very simple. If you got the document through Gmail you can ‘Open as PDF’. Or if it is shared with you, you can directly open the Google Docs link.
- Assuming you have opened the doc. The next step would be to find the signature field. For the tutorial:
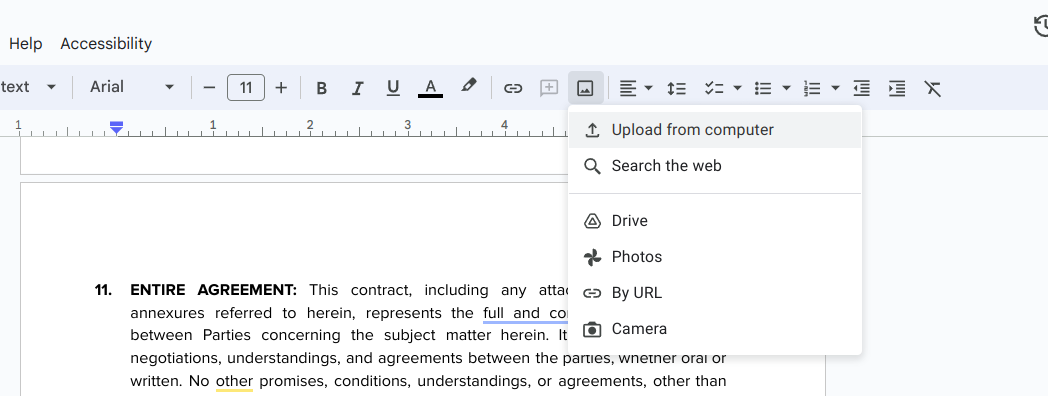
- As our signature file is in image format, let’s upload it, head over to the menu bar and you will find an image icon tap on it, and upload the signature from your computer.
- When you upload the signature from your computer, you may need to format it a little bit changing the size and placing at signature field.
- And you are done. Now just export the document and share.
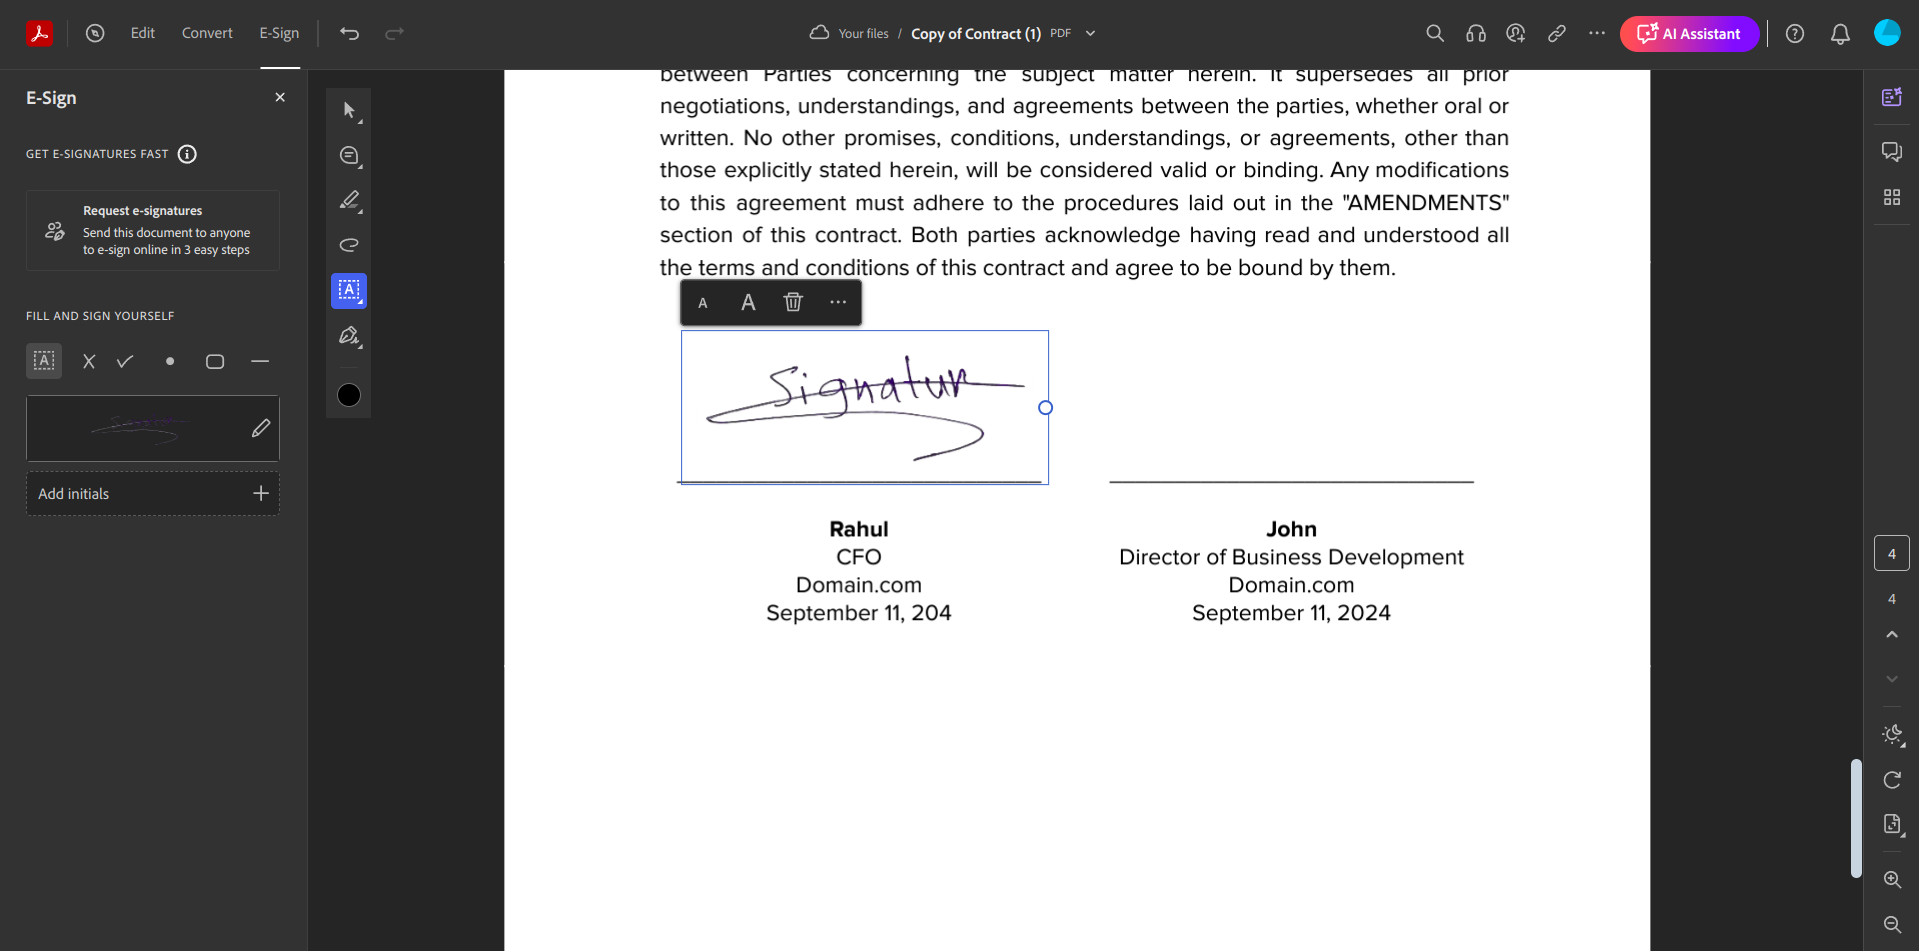
Adding Your Signature to PDFs
You can use multiple online free tools for adding signatures to your PDFs, you just need to upload the PDF and signature the pdf viewer, and then you can place the signature at your desired location.
For the sake of this tutorial, we will be using the web version of Adobe Acrobat.
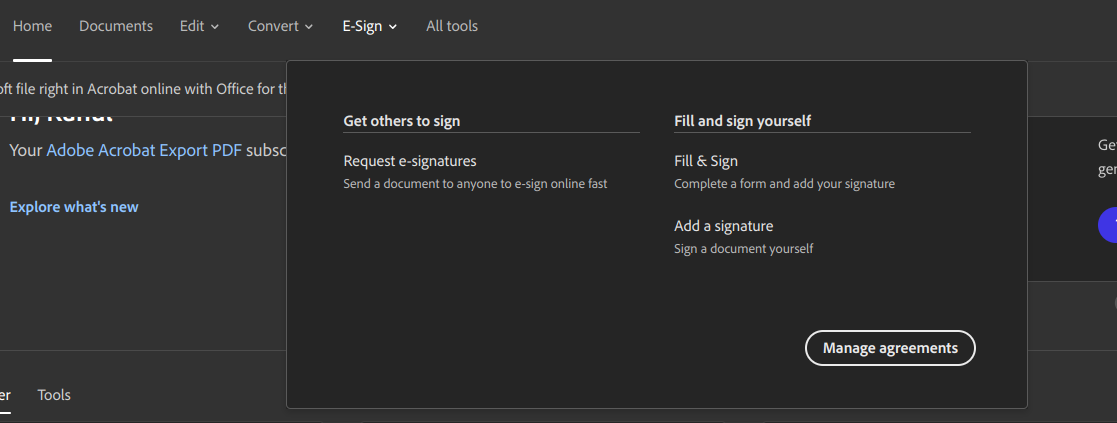
- Head over to Adobe Acrobat, and at the menu bar you will find the ‘E-sign’ dropdown, clicking over it you will see ‘Fill and Sign’
- Click on ‘Fill and Sign’ and upload the PDF File.
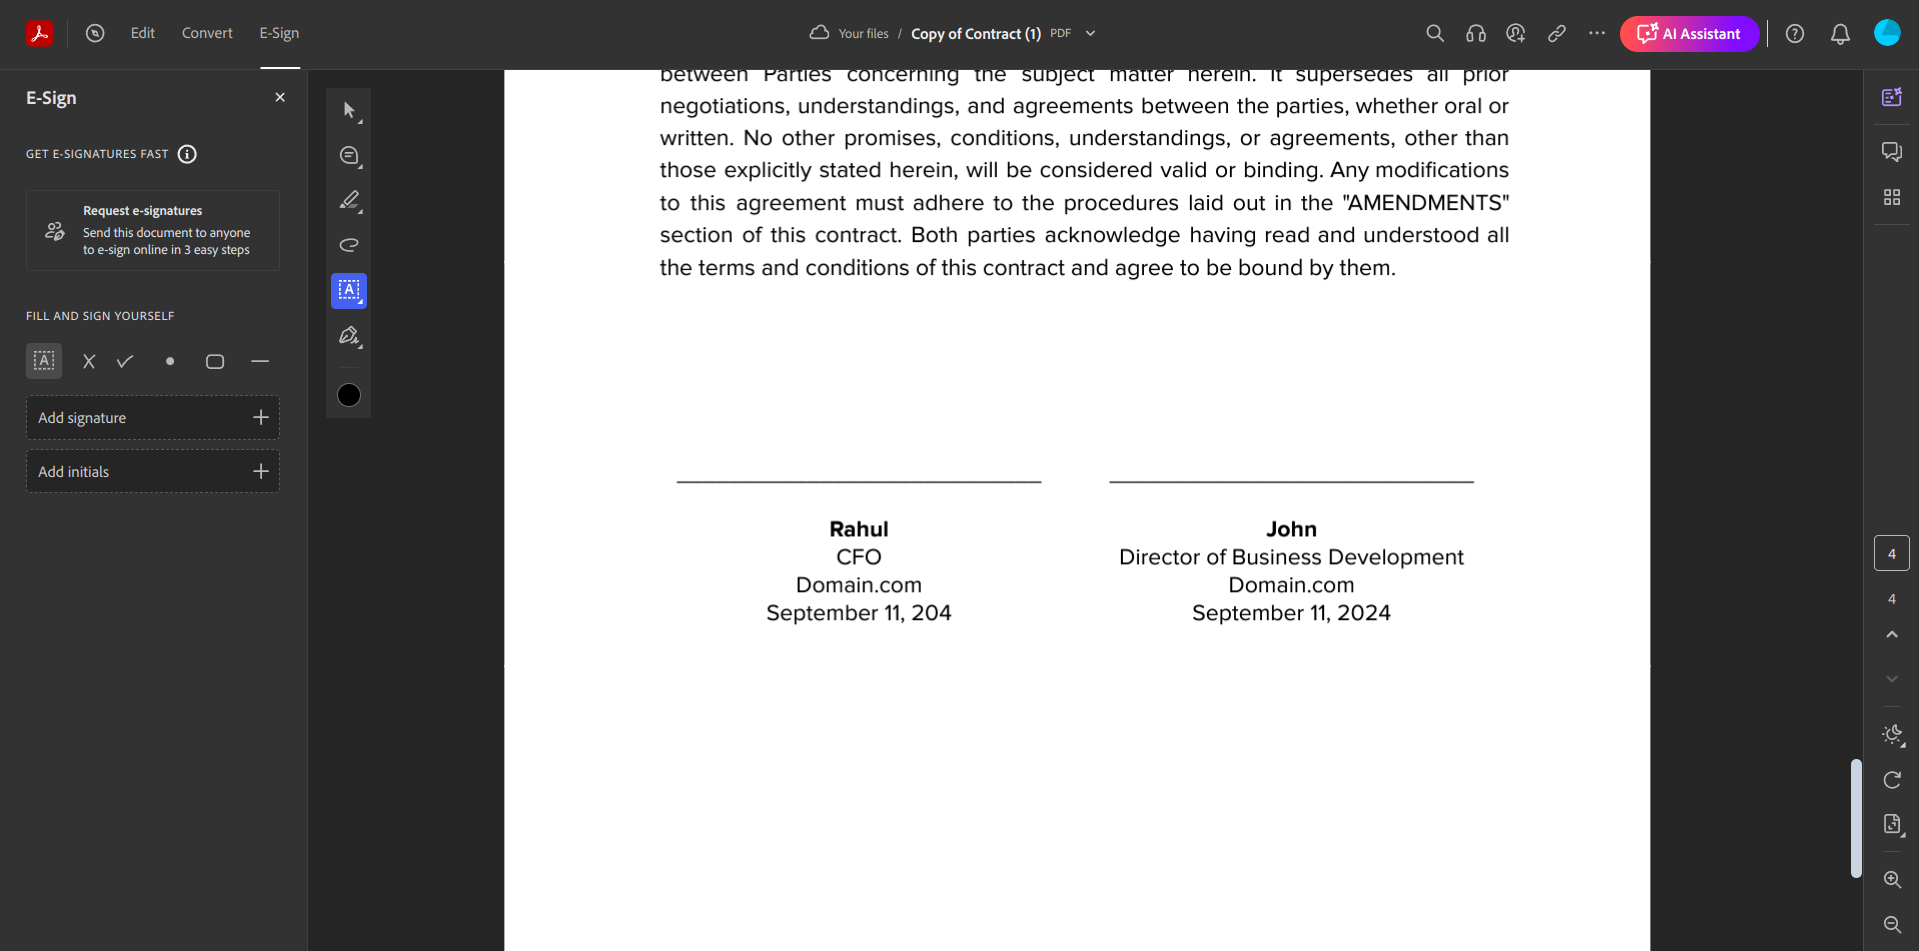
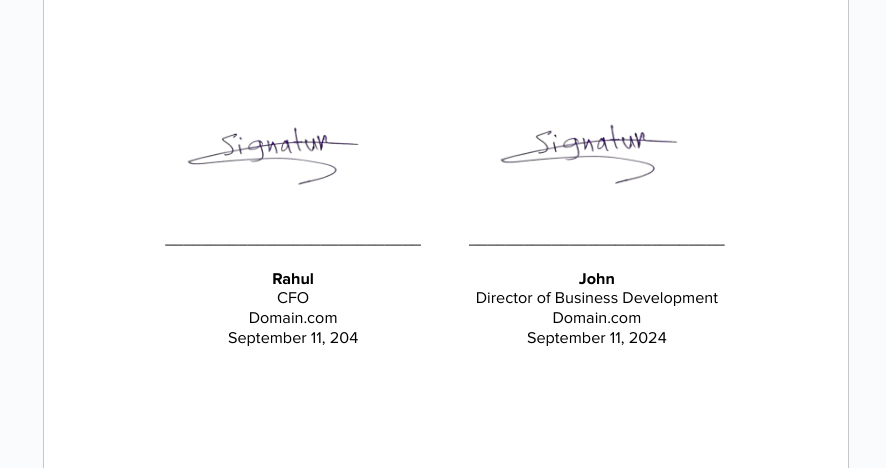
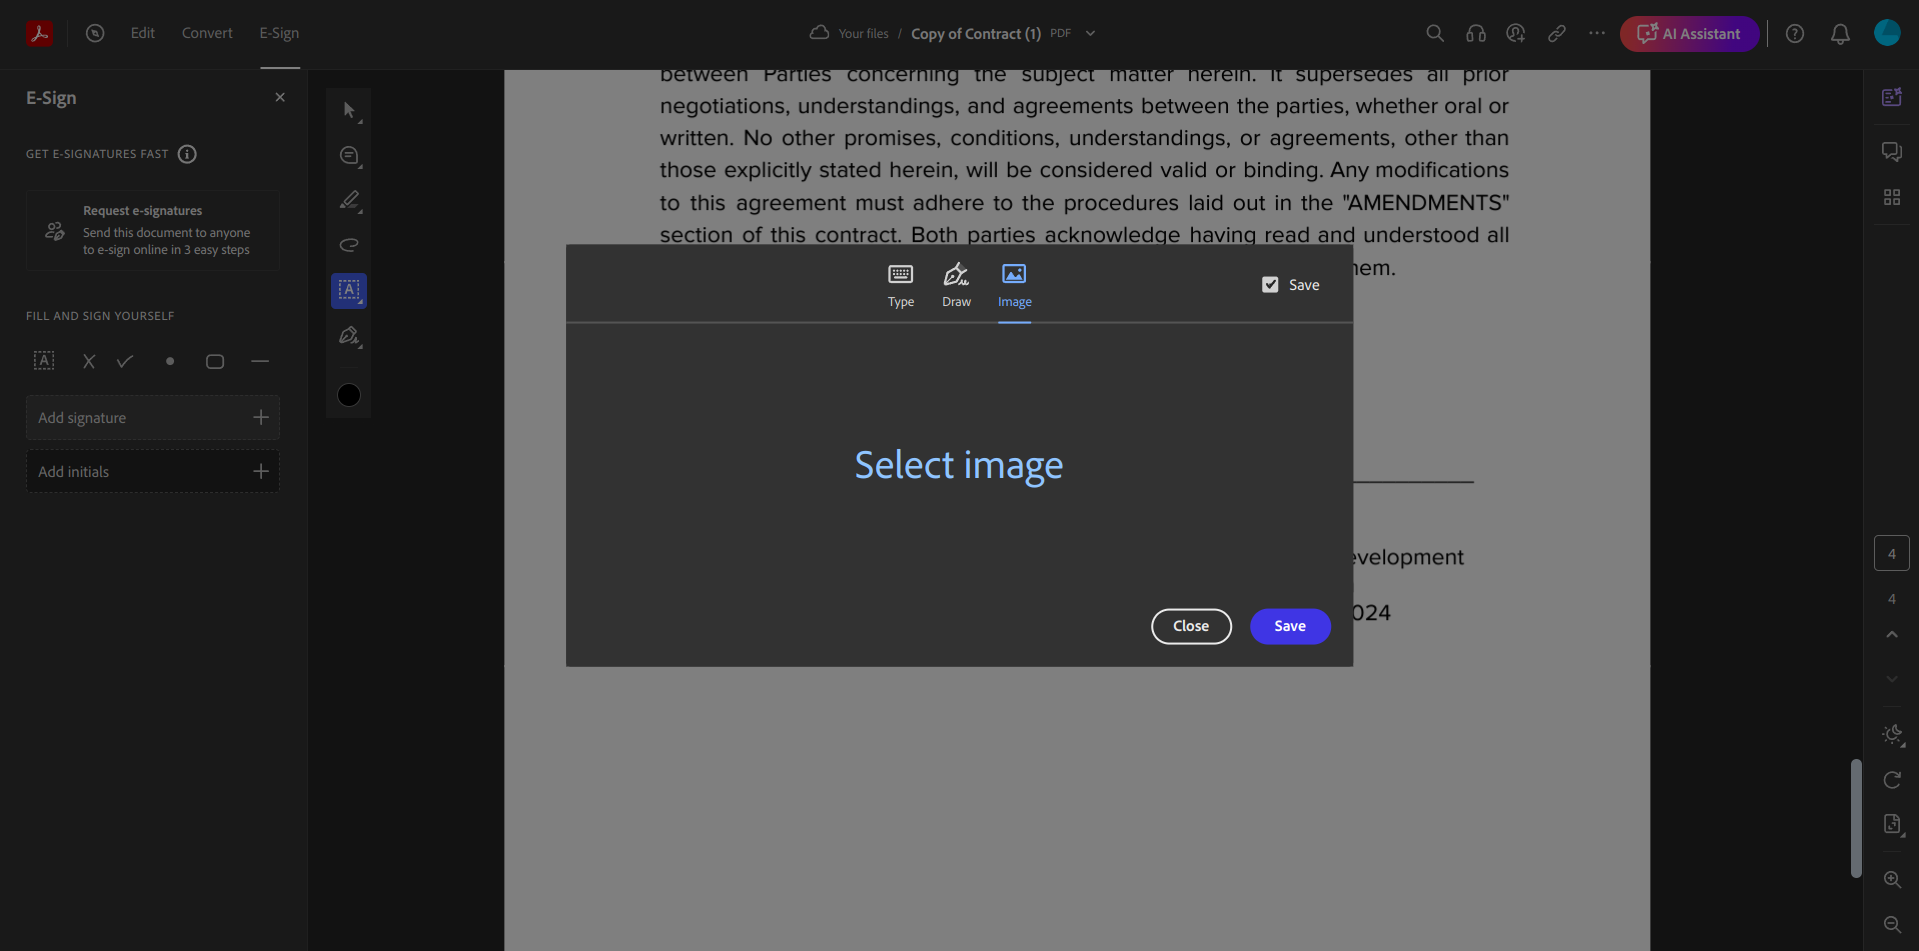
- After uploading the PDF File, on the left-hand side, you can find ‘Add Signature’. Click on it, and the third option would be to upload an image, upload the transparent image we have.
- After uploading the image you can place it in the signature field and it will look something like this.
And you are done. Now you can export the document and send it over. The process is similar to any free online tools you will find from Google.
Making the Most of Your Digital Signature
There are more ways to use your digital signature. You can embed the signature on:
- Online Courses
- Business Cards
- Online Certificates
- Digital Arts
- eBook
- Presentations
And more. This way your files will look unique and legit to anyone accessing them.
You can directly use the image snapped image from the phone, but having a transparent background of the signature ensures that it will fit perfectly and will give a more polished and professional look.
Let’s make your signature transparent, and remove the background from your signature. Try Slazzer Now.


Comments (0)